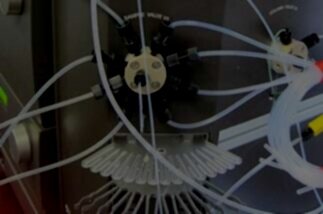
Maintenance & Repair for Agilent 1200 HPLC Systems
You rely on your equipment. Your equipment should rely on ATG.
If you are experiencing problems with an Agilent 1200 series HPLC which requires rapid, professional service, you’ve found the right place. Analytical Technologies Group specializes in the repair and maintenance of Agilent 1200 series HPLC systems. We keep replacement parts in stock and our service technicians focus only on a narrow range of product lines, which means that we can solve your problem rapidly and correctly.
ATG has been trusted to keep over 10,000 instruments running smoothly. Contact us and see why.
Tips for keeping your Agilent 1200 HPLC in good working order:
Ensure it has at least two inches of clearance on the side and three inches of clearance in the back to ensure proper airflow.
The temperature of the room should not change by more than 2°C / hour, and generally should be as minimal as possible.
Before operating the pump, especially if it has been inactive for overnight or longer, flush the vacuum degasser with at least two 3 ml volumes.
Keep your solvent bottles at a higher level than the capillary pump.
Change or refilter your solvents regularly (every two days is recommended) to ensure that there is no algae or other microbial growth which could cause contamination and clog the solvent inlet filter. Use sterile, amber solvent bottles. Filter your solvents before use through filters with a pore size of 0.2 µm or less. Add 0.0001 – 0.001 M sodium azide to the solvent if possible.
Check the purge valve frit and column frit for blockage regularly. If the system creates a pressure greater than 10 bar when pumping distilled water at 5 ml / min with an open purge valve, it is likely that one is blocked and should be replaced.
Periodically check your solvent filter for blockage. A clear solvent filter should allow solvent to freely drip out of the solvent tube from hydrostatic pressure. If the drip is slow, it should be cleaned (by soaking it in 65% nitric acid for one hour then flushing with LC grade water) or replaced.
Replace the manual injector valve seal after 10,000 injections, or less if the valve performance indicates likely leakage or wear.
Flush the injector after using aqueous buffers or salt solutions. This can be done when you are done using the instrument for the day.
Replace the autosampler rotor seal after 30,000 injections, or less if the valve performance indicates likely leakage or wear.
Any time you exchange the variable wavelength detector flow cell, perform a VWD test before your next run.
After exchanging the diode array detector flow cell, perform a holmium or wavelength calibration test before use.
Having technical problems with your Agilent 1200?
Fast Response
We provide very prompt responses to customers within one business day.
Fast Turnaround
Our field service engineers are expediently dispatched across North America & Europe to fulfill your service request.
Expert Staff
ATG’s highly trained, highly skilled staff ensure your instruments remain in optimal condition.
Replacement Parts Stocked
To minimize instrument downtime, we stock virtually all parts for the systems in which we specialize.
Agilent 1200 HPLC Troubleshooting Tips:
Many issues, including pressure issues and detector noise, may be caused by a dirty or system or air in the system. Check your buffers and inlet filters to ensure they are clean. Check to ensure there are no leaks in the system. Purge the system thoroughly.
If the pressure ripple is unstable or solvent drips from the waste outlet when the valve is closed, run the pump test to determine if it is internally leaking. If so, you may need to replace the passive inlet valve, outlet ball valve, purge valve, and / or purge valve frit.
If you get a leak error, check to ensure all fittings are tight and capillaries are unbroken. Note that you can have a leak without getting a leak error, especially if your flow rate is very low, so other problems which are caused by leaks are possible even if you are not getting a leak error.
If you get an index adjustment or index limit error, that indicates something is wrong with the pump. Remove the pump head and inspect the seals, pistons, and other internal components. Clean any dirty or contaminated components, and replace any components which show wear or damage. If there are no such issues, the pump drive likely needs to be replaced.
A motor-drive power error generally occurs when there is a blockage in the flow path before the damper. However, if the pressure sensor is not functioning properly, the blockage could be further downstream. It is also possible that there is a partial mechanical blockage in the pump head or pump drive assemblies. If none of those are the cause, then the pump drive assembly or main board need to be replaced.
A pressure above upper limit error could simply be due to the upper pressure limit being set too low for your application. If it is not, there is likely a blockage in the flow path. You’ll have to hunt for the blockage, but the inline filter frit, autosampler, column frits, and smaller capillaries are the usual culprits.
A pressure below lower limit error could simply be to the lower limit pressure being set too high. If it is not, you probably have a leak. Inspect the pump head, capillaries, and fittings. Purge the system then run a pressure test to help determine what module component is defective, if any.
If you get a pump head missing error, you likely manipulated or changed your pump head and didn’t reinstall it correctly. Ensure it is and ensure there are no physical impediments between the pump head and body. If that is not the problem, you may have a broken piston in need of replacement.
A temperature limit exceeded error could be caused by a partial mechanical blockage in the pump drive assembly causing friction, or by partial blockage of the flow path in front of the dampener.
An initialization failed error could be due to mechanical obstruction of the autosampler. If there is no obstruction, something you can’t replace yourself is defective. Call for service.
A metering home failed error could be caused by a broken metering piston. Replace the metering piston and seal. If that is not the issue, you’ll need to call for service.
A motor temperature error could also be due to a mechanical obstruction, or it could be due to overly high motor belt tension. Switch the autosampler’s power off, wait at least 10 minutes, then turn it back on. If that does not solve the problem, there is likely an issue which is not solvable by an end user.
A needle down error could be caused if the wrong needle type is being used or if the needle is not installed correctly.
A UV lamp current or UV lamp voltage error often means the UV lamp requires replacement, although the UV lamp current error could be due to an improperly seated UV lamp.
If your problems cannot be resolved, your HPLC may require professional maintenance. Contact ATG for prompt, qualified service.